Showing posts with label crafts. Show all posts

Friday, May 30, 2014

Soccer Themed Name Letters

Finally finished Little Man's name letters. He had a bit of a hard time deciding what he wanted. At first, he said soccer. But then he wanted Hunger Games themed letters. Wasn't sure what I was going to do for that, but said okay. Then, we found some cool Minecraft stickers so he changed his mind again. THEN he thought Minecraft Hunger Games would be cool...with the Os in his name soccer themed. Luckily, he went back to soccer themed for all his letters. Made life a little easier ;-)

Or so I thought LOL Things are never as easy for me as I assume they will be.

As usual, I found a picture online that I could print out and use as a stencil. I took his letters (which were dark green and brown with dinosaur stickers) and painted them white. And then put my stencil over the letter and started tracing. With a ballpoint pen.

Don't ever do this.

Because if you mess up, you are stuck. This is after five...that's right FIVE...coats of white paint. It was a black ball point, so the black went away but those blue lines...yeah, there was nothing I could do to cover those puppies.


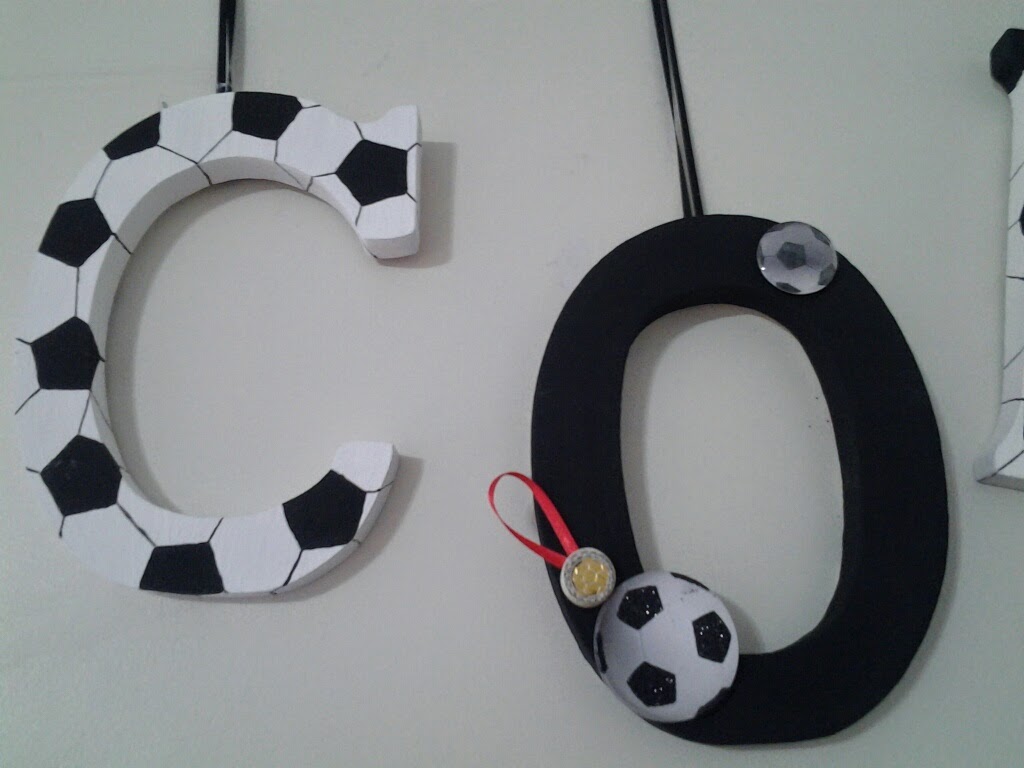
My solution...I decided to paint the Os black. It ended up being a happy accident because the Os ended up looking great breaking up the soccer ball pattern of the other letters.


I went back and forth over adding the soccer ball pattern on the black Os in white, which I think would have looked really cool. But we found some fun 3D stickers and in the end, I think it ended up looking really good :-)

Then, back over to the white letters. This time I traced the pattern in pencil. Worked MUCH better. Black paint for the little inside bits and a fine-tipped Sharpie for the lines and I had some soccer ball-looking letters :D


Thursday, May 8, 2014

Name Letters

When decorating my kids' rooms, one thing I always like to have up on the walls is their name. You can get the block letters fairly cheaply at any craft store, even at Walmart, and decorating is a blast :)

I've seen some pretty elaborate designs and I'd love to try to get a little more fancy, but you can create really cute letters with very little time or money. I just redid my daughter's letters. She did have a princess theme:


These were created very simply by painting the letters in the colors of her choice, and then adding those 3D puffy stickers. A little ribbon stapled to the back and we have a cute set of letters for her wall :)

However, I was recently informed that she is now 8 years old, almost 9, and that means she is a big girl and doesn't want princess stuff anymore :) So, she chose a new color and theme (gymnastics and peace signs, her two favorite things in the world). Again, very simple, just paint and stickers, but they turned out so cute :)


For my stepson's adorable baby, I went a little more elaborate. His nursery is jungle themed, so I printed out a zebra stencil and painted the pattern onto his letters. It's  hard to tell (if I did these again I'd probably alternate designs, making half a giraffe pattern or just polka dots or something) but the A, T, and N are painted brown with white stripes, and the X and O are white with brown stripes. A few jungle stickers and some giraffe print ribbon and Axton's letters were ready to go :)


At the moment, my son has a dinosaur theme. 


He'd like to change his, but he couldn't make up his mind between soccer and The Hunger Games lol So, we are going to combine them (his idea) and make the O's in his name soccer balls and the other letters Hunger Games themed. I'm still working on these, but I'll post them when I'm finished :)

Doing these letters really is a lot of fun, and it's an inexpensive way to jazz up a room. You can get really elaborate with them, either painting more complicated patterns or using wallpaper or contact paper to cover them, add feathers, glitter, jewels, ribbon, or any number of the fun pins/medallions/charms, etc that craft stores carry, to make these really special and one-of-a-kind. Or go simple with a coat of paint and a few stickers and you still end up with something cute to go on the wall.

And what's nice is that these are super easy to redesign when your kiddo decides he or she wants a change. Just peel off the old stickers or materials, repaint, and add new bling. The letters can be up to $8 a piece, depending on the size and style you want. But since you can redesign them over and over, they aren't a bad decorating investment :)




Wednesday, April 9, 2014

Book Page Beauty

I have a houseful of books. They are everywhere. And I love it :-D But every now and then I end up with a book I either don't want, or it's been damaged in some way so I can no longer read it, or give it away. But throwing any book away makes me absolutely cringe in horror.

Luckily, there are people out there who are much more creative than me :-) I will definitely be trying to make a few of these gorgeous book page beauties in the near future :-)


I'd love to renew my vows just so I can carry one of these :-D


You absolutely must check out The Nesting Place - she has 20 ways to decorate with book pages and they are AWESOME ya'all. This book page wreath is one of her ideas.

And this...I can't even tell you how much I want this :-) Absolutely stunning clock made from sheet music.

Found on Pinterest linked to My Sweet Savannah. Check out her site, it's amazing!


Monday, April 7, 2014

Frozen Easter Decorations

If you happen to live in a place that still gets below freezing around Easter time, these are fun outdoor decorations that you can do with your kids. I'm always finding fun little crafts and experiments on Pinterest, but few turn out like the pictures lol 

These, however, actually turned out pretty well. And they are so simple to make! If you can fill a water balloon, you can make these. All you have to do is take the balloon, put a few drops of food coloring in, and then fill them up. If it's cold enough, you can then just gently place them outside overnight. In the morning, peel the balloon off and you are left with these pretty frozen globes of ice. 


If your weather has (hopefully) warmed up, you could probably just toss these in the freezer overnight and get the same results (though of course they won't last as long once you put them outside) :)


Next time we do these, we'll try larger balloons and maybe place them in a bowl or something so they turn out more round instead of egg shaped. But this shape is perfect for Easter decorating!